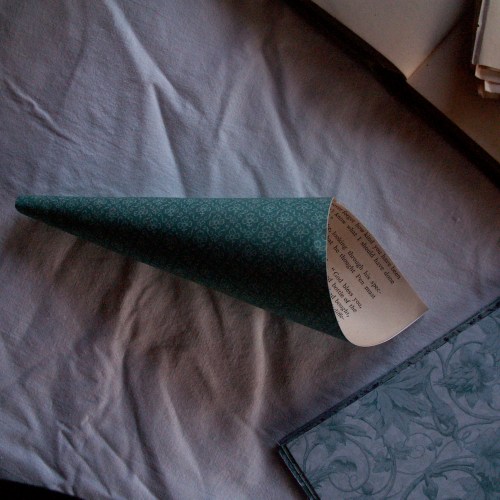
I thought I would do a tutorial on how to make a really gorgeous, incredibly easy, advent calendar, and post it here today for anyone who was having a little panic at not being ready for Advent when it arrived…
That was, until our smallest did a grab-and-run with the camera while I was teetering on top of a wobbly chair in from of an open fire… (having a solid chair and fire-guard would compromise on the spirit of adventure)…
and dropped it
And now it is no longer with us. There isn’t as much as a flicker (apart from a disturbing consumptive-cough sound)
So, here is part 1 of the tutorial. When I sort out my camera issues, I’ll photograph the advent calendar in situ, but for now, I have the How-To, without the final pictures, but you will get the idea.
The How-To: Part 1:
What you need:
24 squares of decorative paper (you could cut out 24 squares from wrapping paper)
24 squares of old vintage book sheets(or music sheets- and if they aren’t yellowed with age, you could dip them in a strong tea solution and dry them out before using)
Pva (I diluted mine 50/50 with water in a jar)
Glue gun (not essential, but I recently purchased mine and it has been super for this project- instant glueing!)
Buttons (or old lace or beads or other nice bits)
I squared these decorative sheets and so they (almost) matched the book sheets (it needs to be almost the size, but there is room for manoeuvre)
With the PVA solution, I glued the sheets together, making sure that at least one corner is exactly glued together (even if the other sides aren’t quite perfectly aligned)
Then, when they were dry (once I had glued all 24 sheets, the first ones were dry and ready to go onto the next bit) I rolled them into a cone,
(You may have to experiment to get the cone looking right, with the matching corner pieces sticking uppermost)
I used my (wonderful, brilliant, time saving) glue gun to glue down the “seam” of the cones,
and glued on the button(s)
(You could sew them together with a simple running stitch, or use a strong glue and hold in place for a couple of minutes until they are dry- or! have some clothes pegs at the ready, glue, then peg them and move onto the next one, and the peg should hold them in place until glued firmly)
Then! Put in a very lovely little suitcase lined with some vintage, linen, monogrammed cloth and wait for your child to break your camera, halt the tutorial until you can take more photographs for the next part.
The Next Part: Part 2: Coming Up!
I wrote out the numbers 1-24, then, with some old pegs, pegged each cone onto a piece of string and strung above the mantlepiece. Not rocket science, but very pretty, as you WILL see!!
(I’m also linking to The Christmas Craft Collective, check it out here!)


Gorgeously unique, E.
super cute emily! i’ve been hunting creative advent ideas. I cant wait to see the finished project and would love to know what sorts of things you put in them.
Since we have been snowed in for 2 days, they have remained empty!!!!!!! I will make it up to them… (and if not, they will never let me forget it, ha ha) Have you had a look at the Crafty Crow? I’m constantly being inspired there. Thanks for the lovely comment! happy Advent! XX
Thank you Nuala, hope you had a great night on friday, and Saturday- I didn’t make either, had my graduation – everything always happens together!!
This is lovely, and the background story just adds to the fun (though not from your point of view, obviously). Nice one.
Pingback: Crafty Blog Update 28th Nov-4th Dec « Irish Knitting & Crochet
Pingback: Craft♥Advent, Day 1 – the Nest